安装XDebug
- 使用brew install安装对应版本的XDebug。使用命令:
brew search xdebug - 对于我的mac来说,要安装的版本是php7.1的XDebug,故而安装:
brew install homebrew/php/php71-xdebug - 安装完毕后执行
php -i | grep xdebug查看是否有输出(有输出就是安装上了)
xdebug
xdebug support => enabled
xdebug.auto_trace => Off => Off
xdebug.cli_color => 0 => 0
...```

#配置XDebug
* 执行`php -i | grep php.ini`找到mac上php.ini的位置
Configuration File (php.ini) Path => /usr/local/etc/php/7.1
Loaded Configuration File => /usr/local/etc/php/7.1/php.ini`
- 使用编辑器打开php.ini后,加入如下配置:
[Xdebug]
zend_extension="/usr/local/Cellar/php71-xdebug/2.5.1/xdebug.so"
xdebug.remote_enable=1
xdebug.remote_port=9000
xdebug.profiler_enable=1
xdebug.idekey = PHPSTORM
注:上面的zend_extension是你的xdebug的真实安装位置,如果忘记的话,可以执行brew info <第一步安装的xdebug> 来找到位置
配置PhpStorm
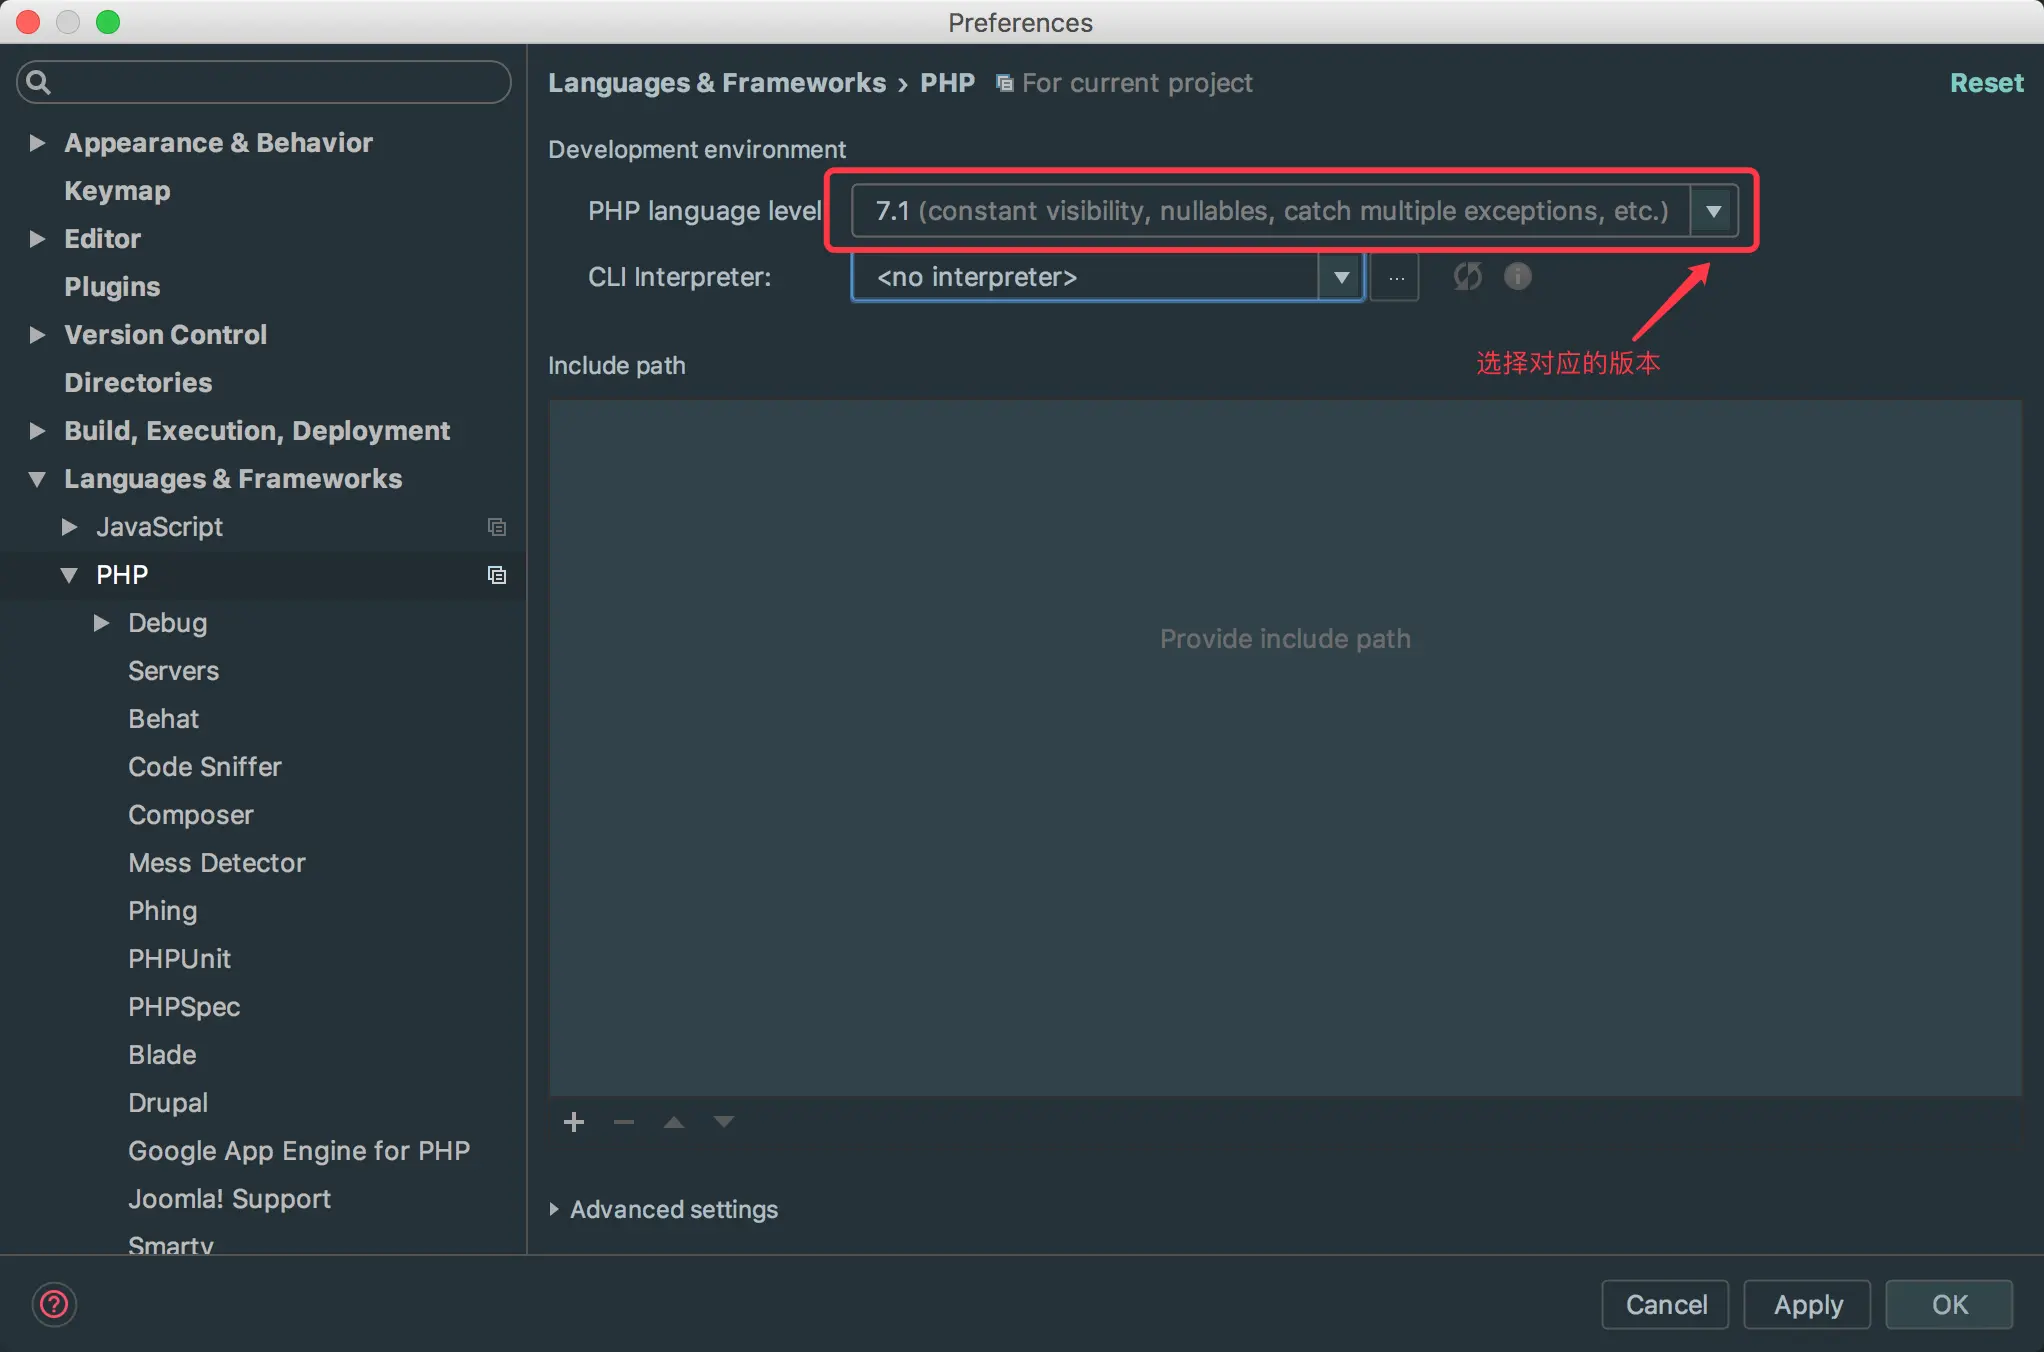
- 打开偏好,切换到
Language & Frameworks->PHP, 会看到如下窗口:
PHP配置界面
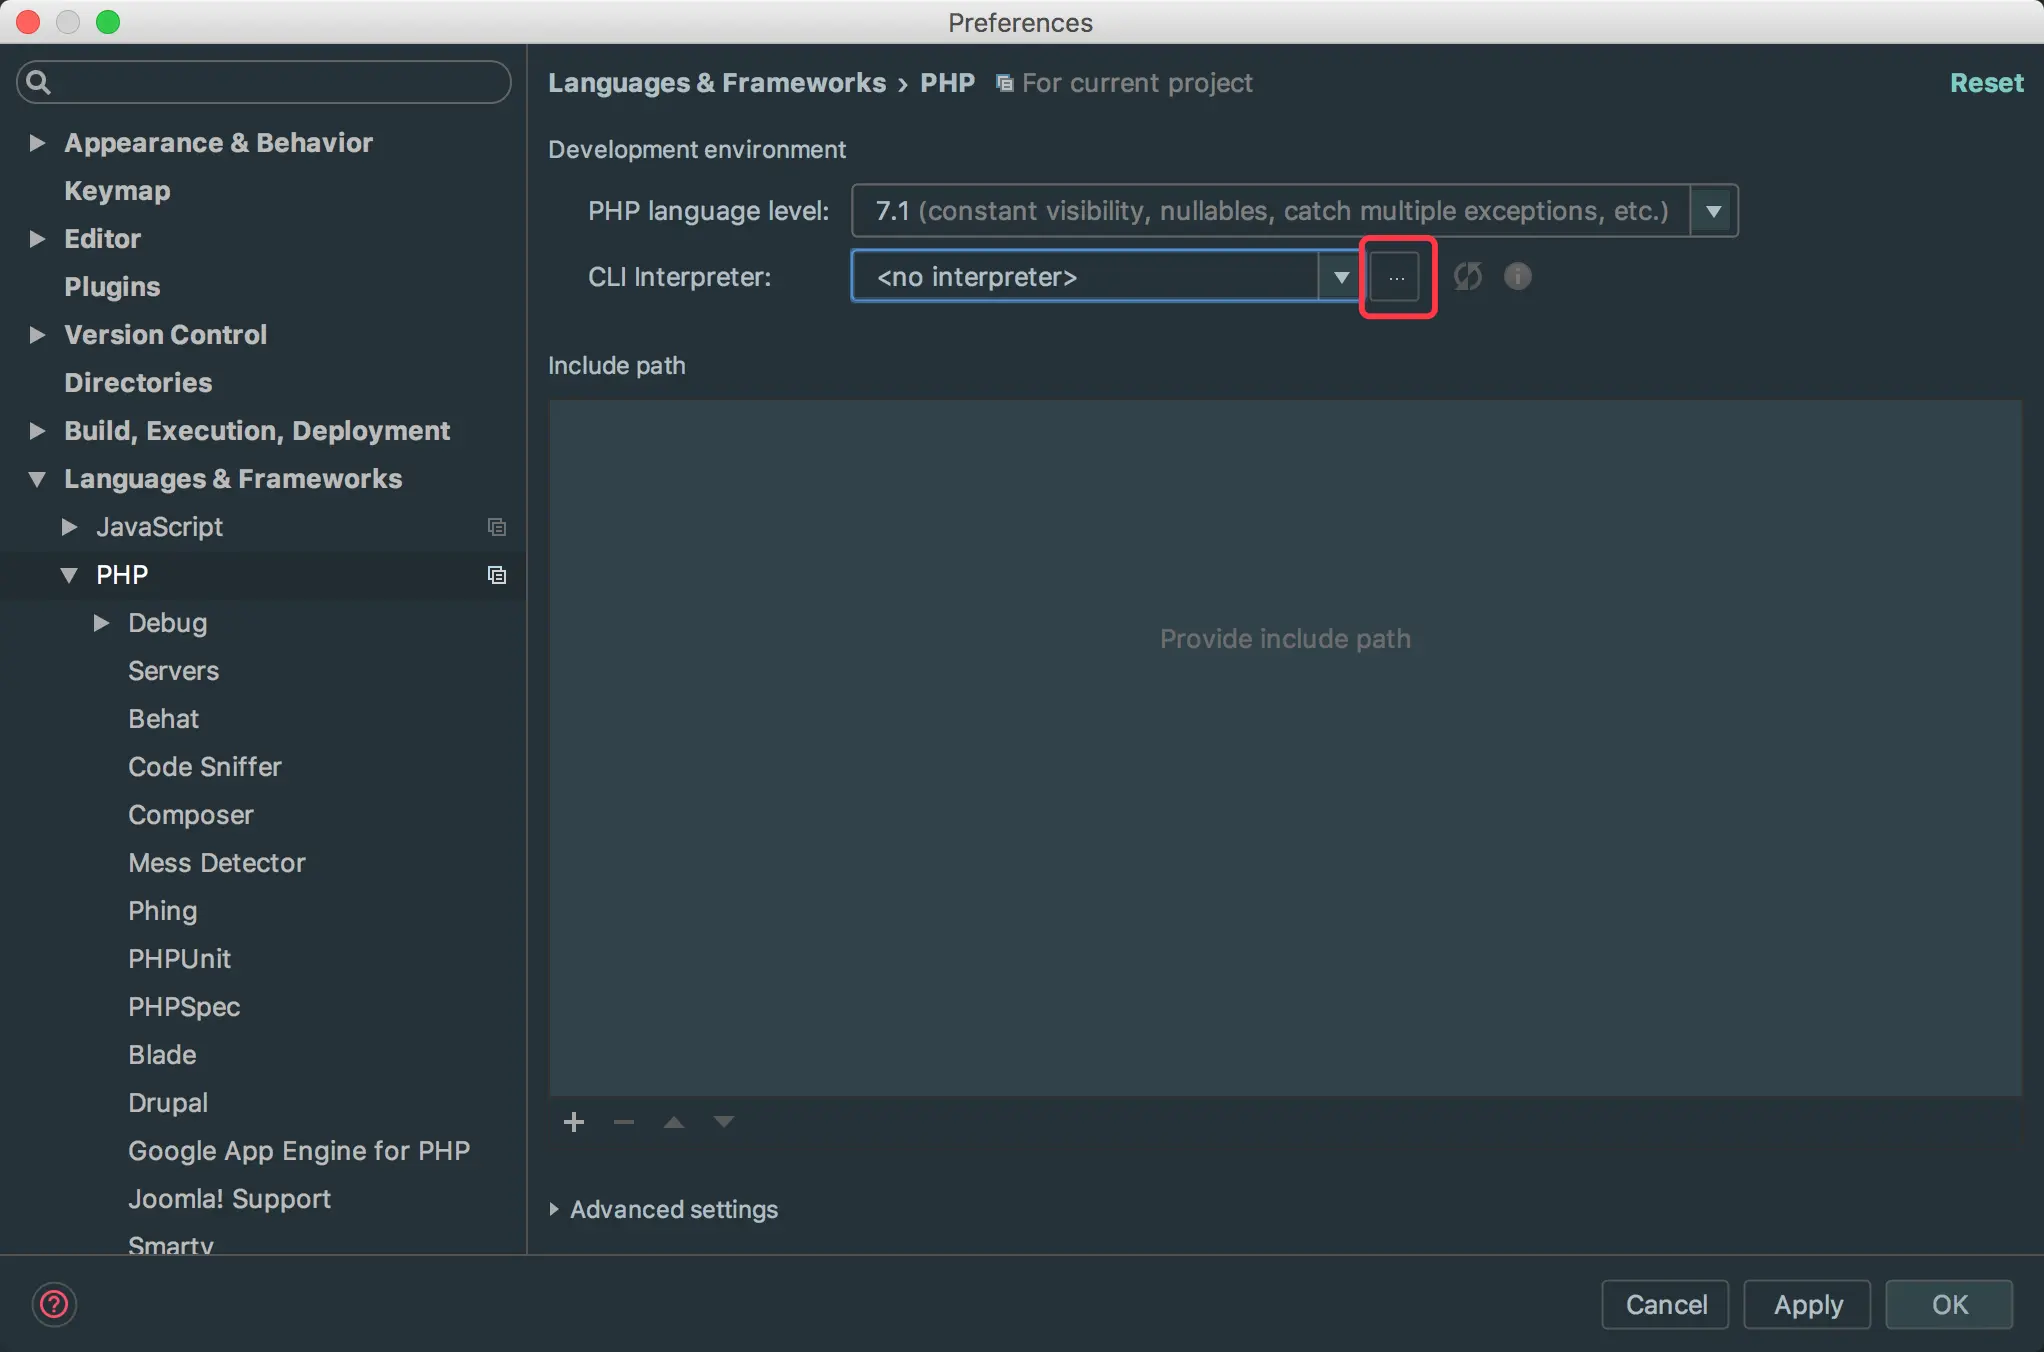
- 点击CLI Interpreter旁边的
点点点:
点击点点点
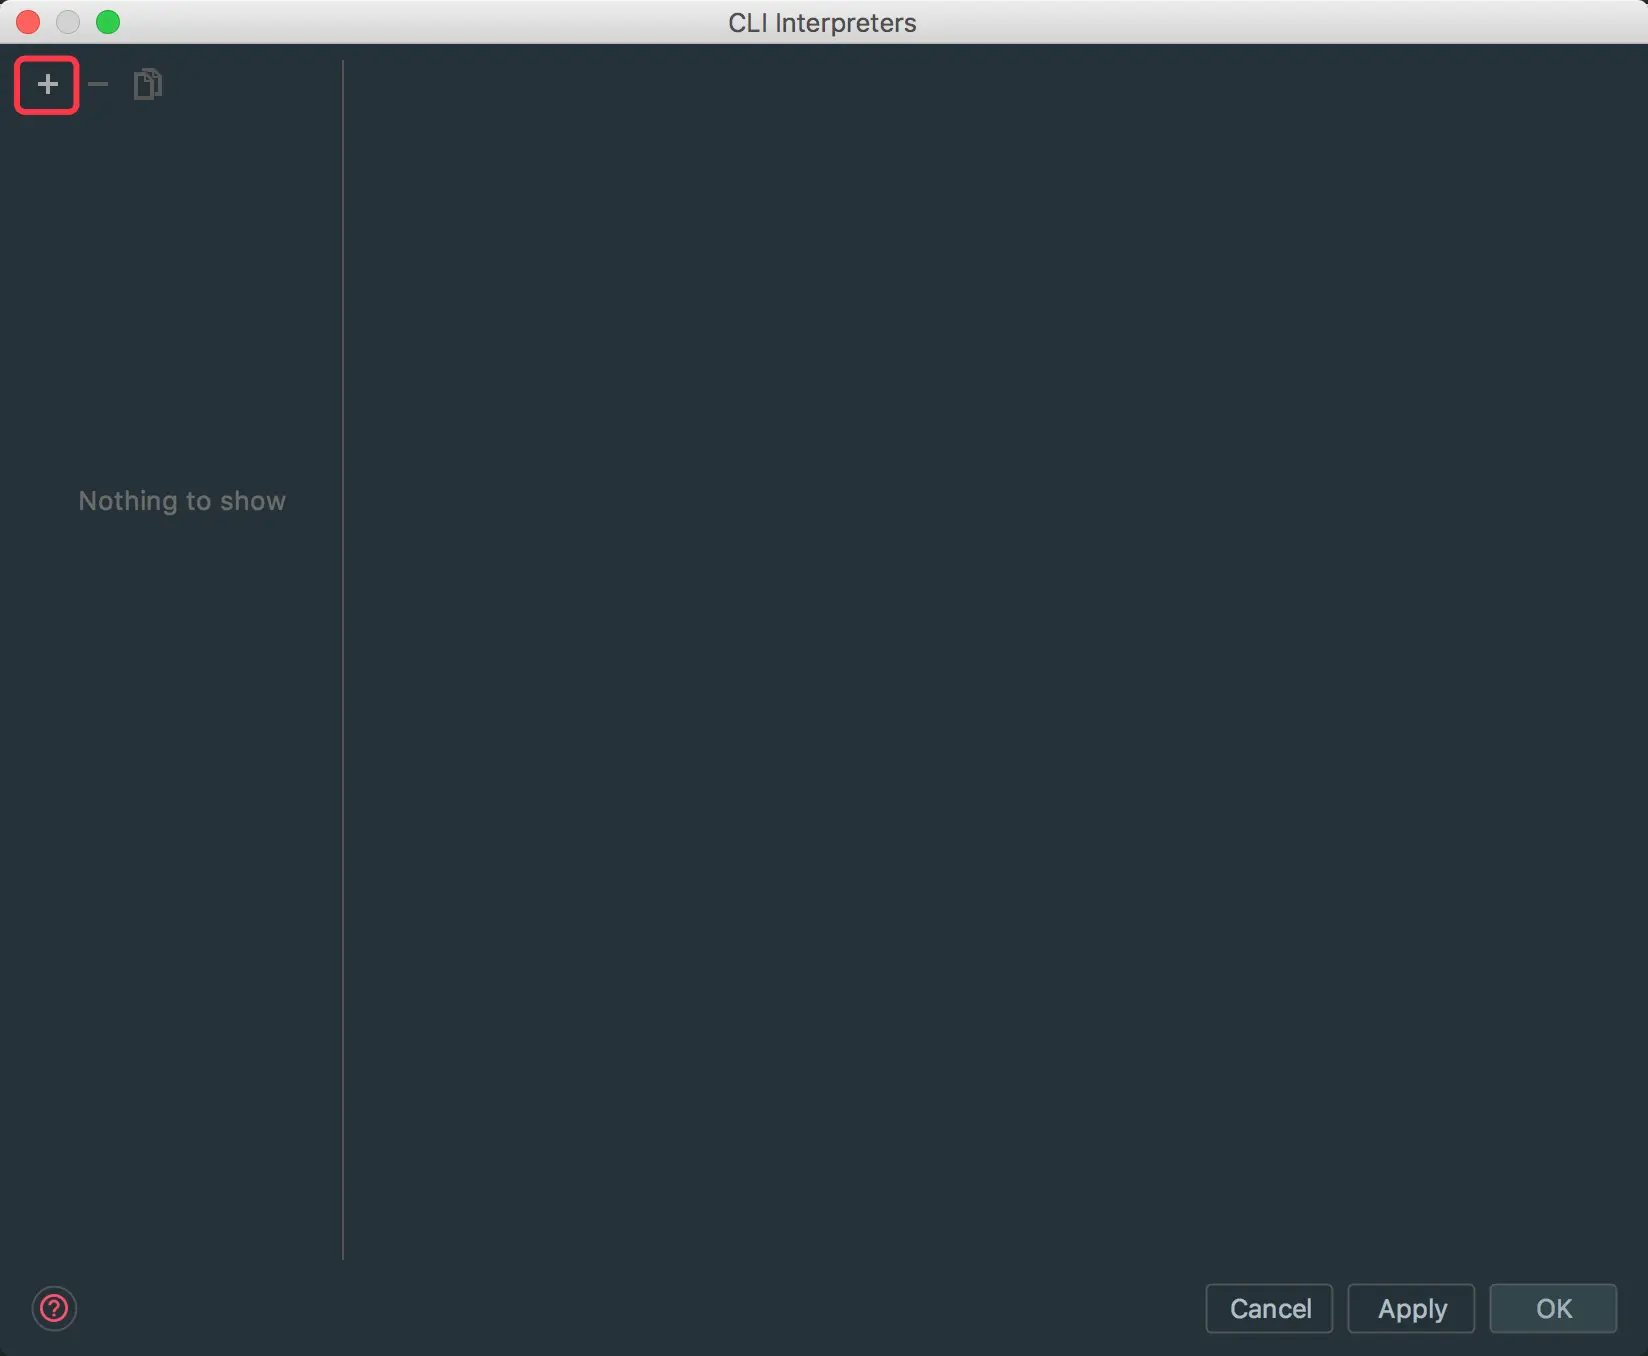
- 点击加号来添加mac上对应的php解释器的路径:
添加php解释器路劲
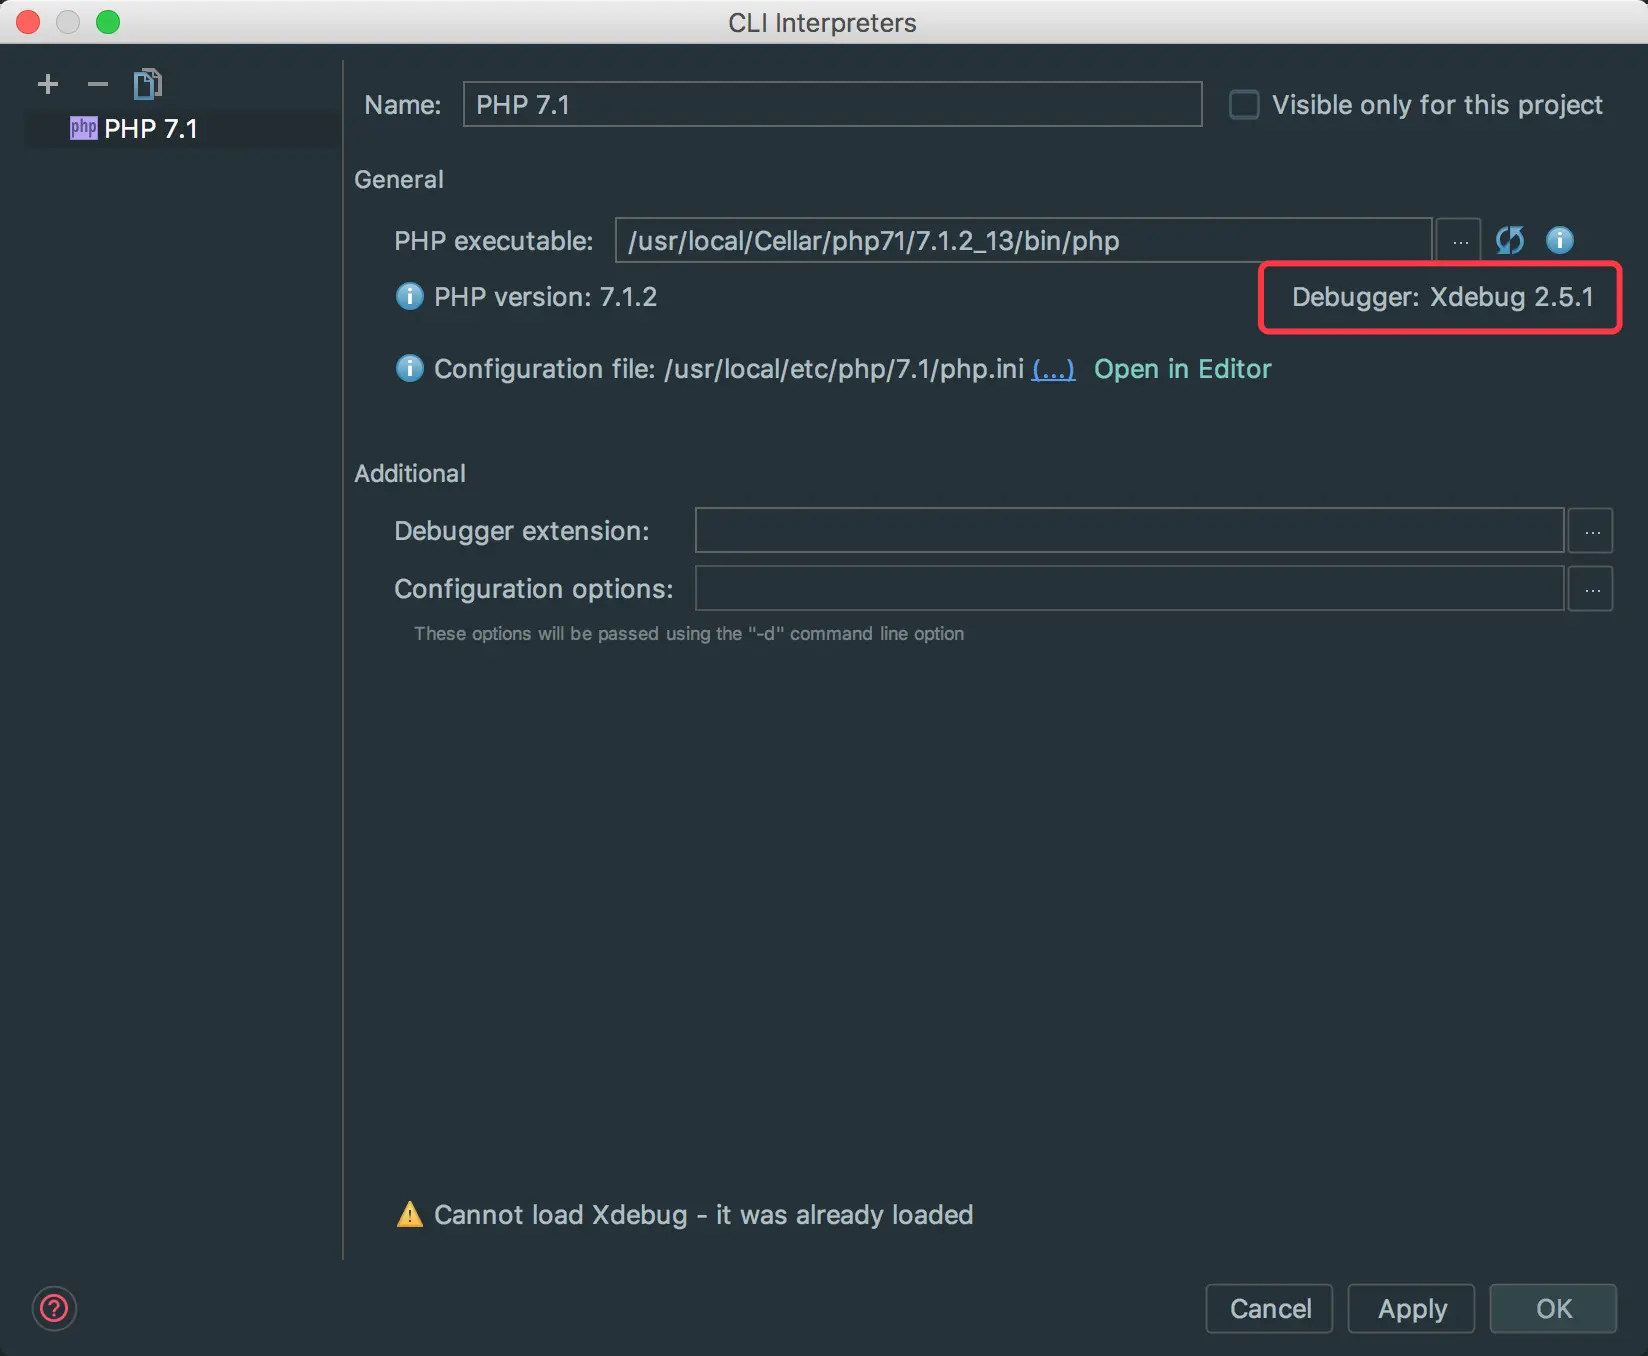
- 添加完毕后,会出现
Debugger: XDebug 2.5.1
添加完毕
- 点击OK来应用和关闭这个界面。
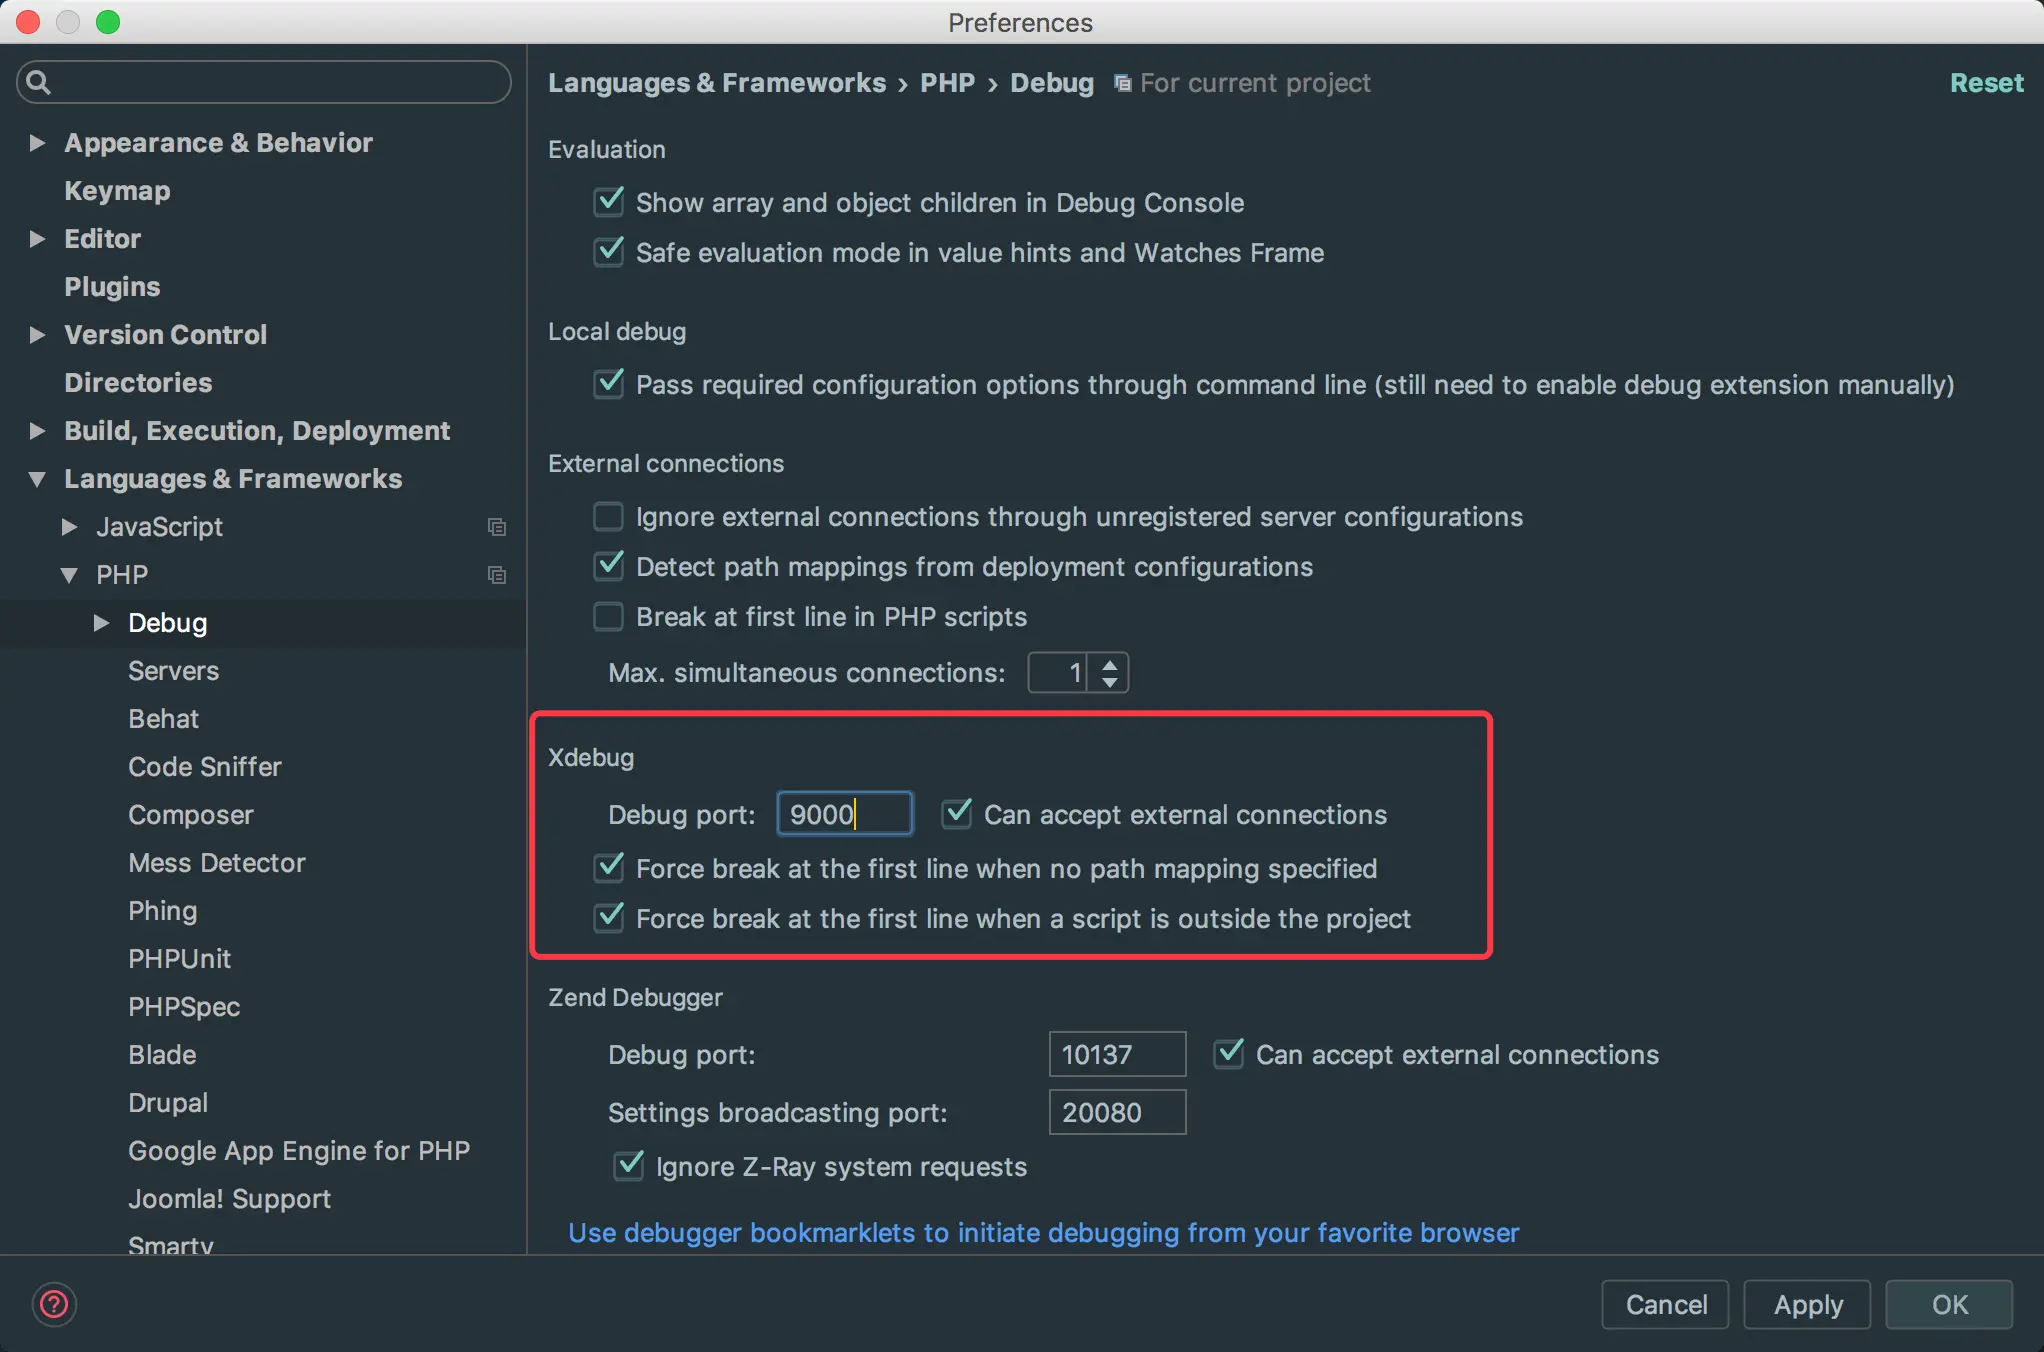
- 然后点开
PHP->Debug,填上XDebug的对应信息:
填入XDebug的信息
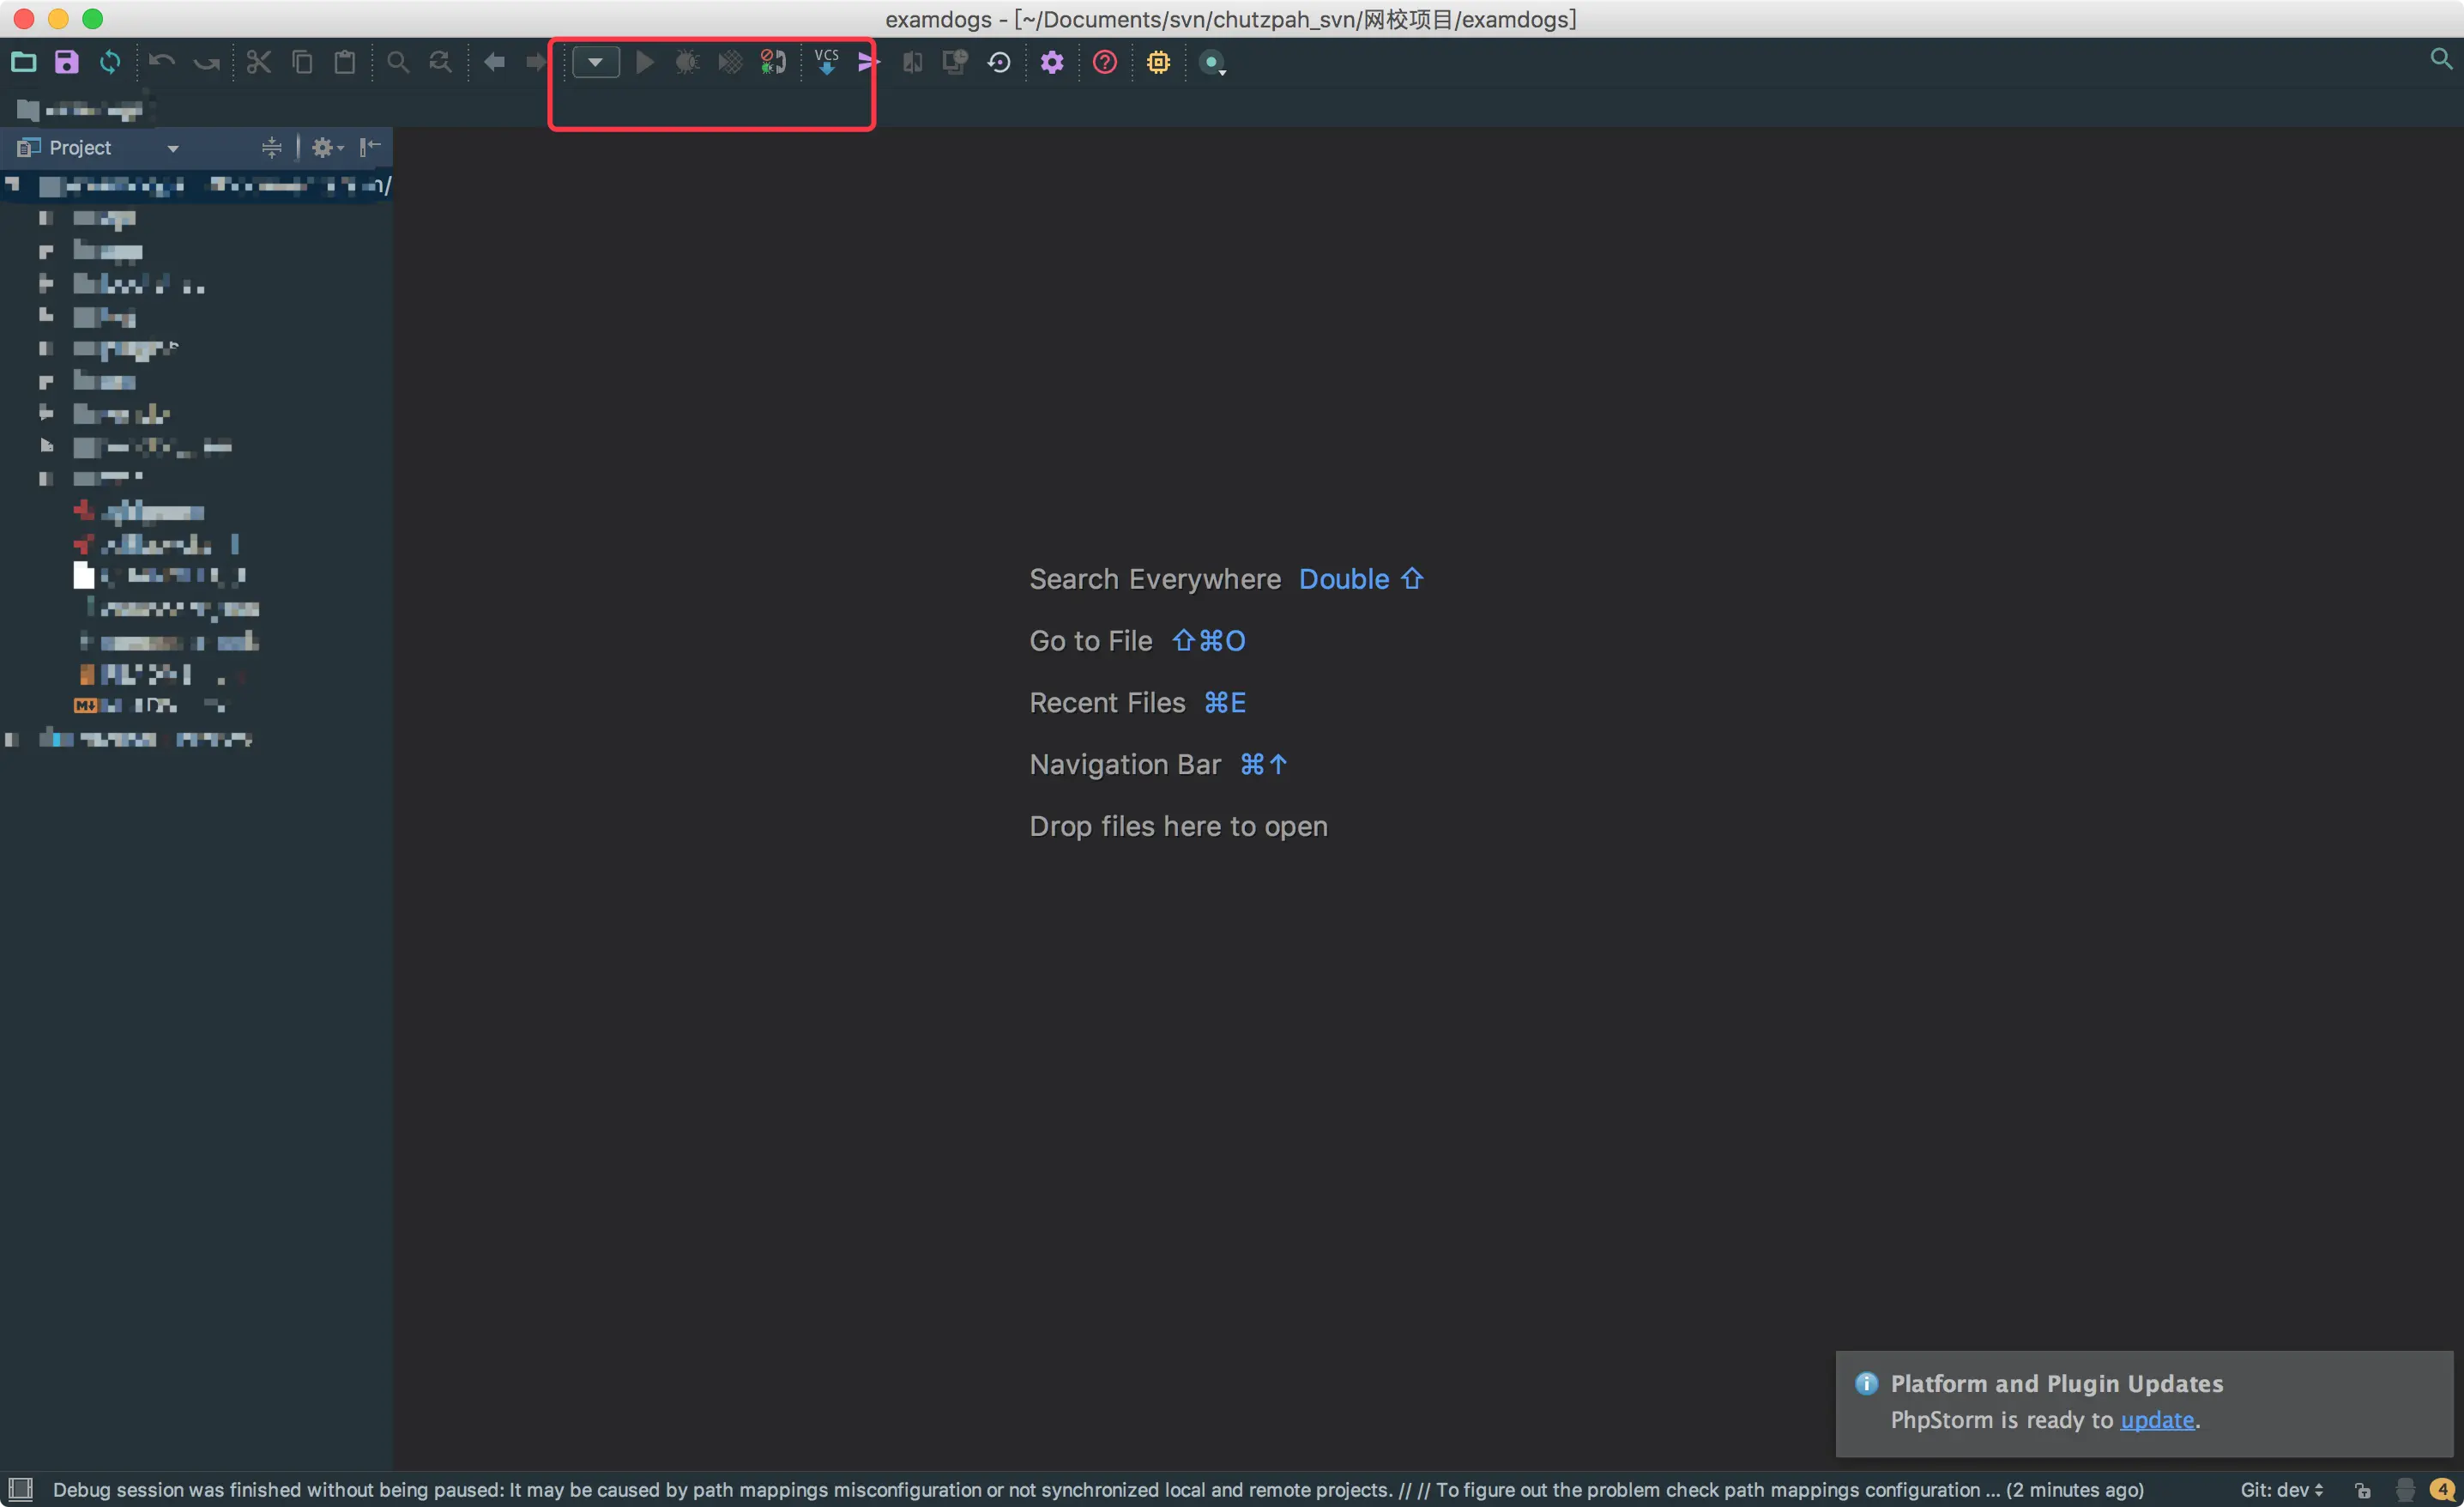
- 打开对应的PHP项目并点击导航条上的向下小箭头的 edit configurations:
点击小箭头
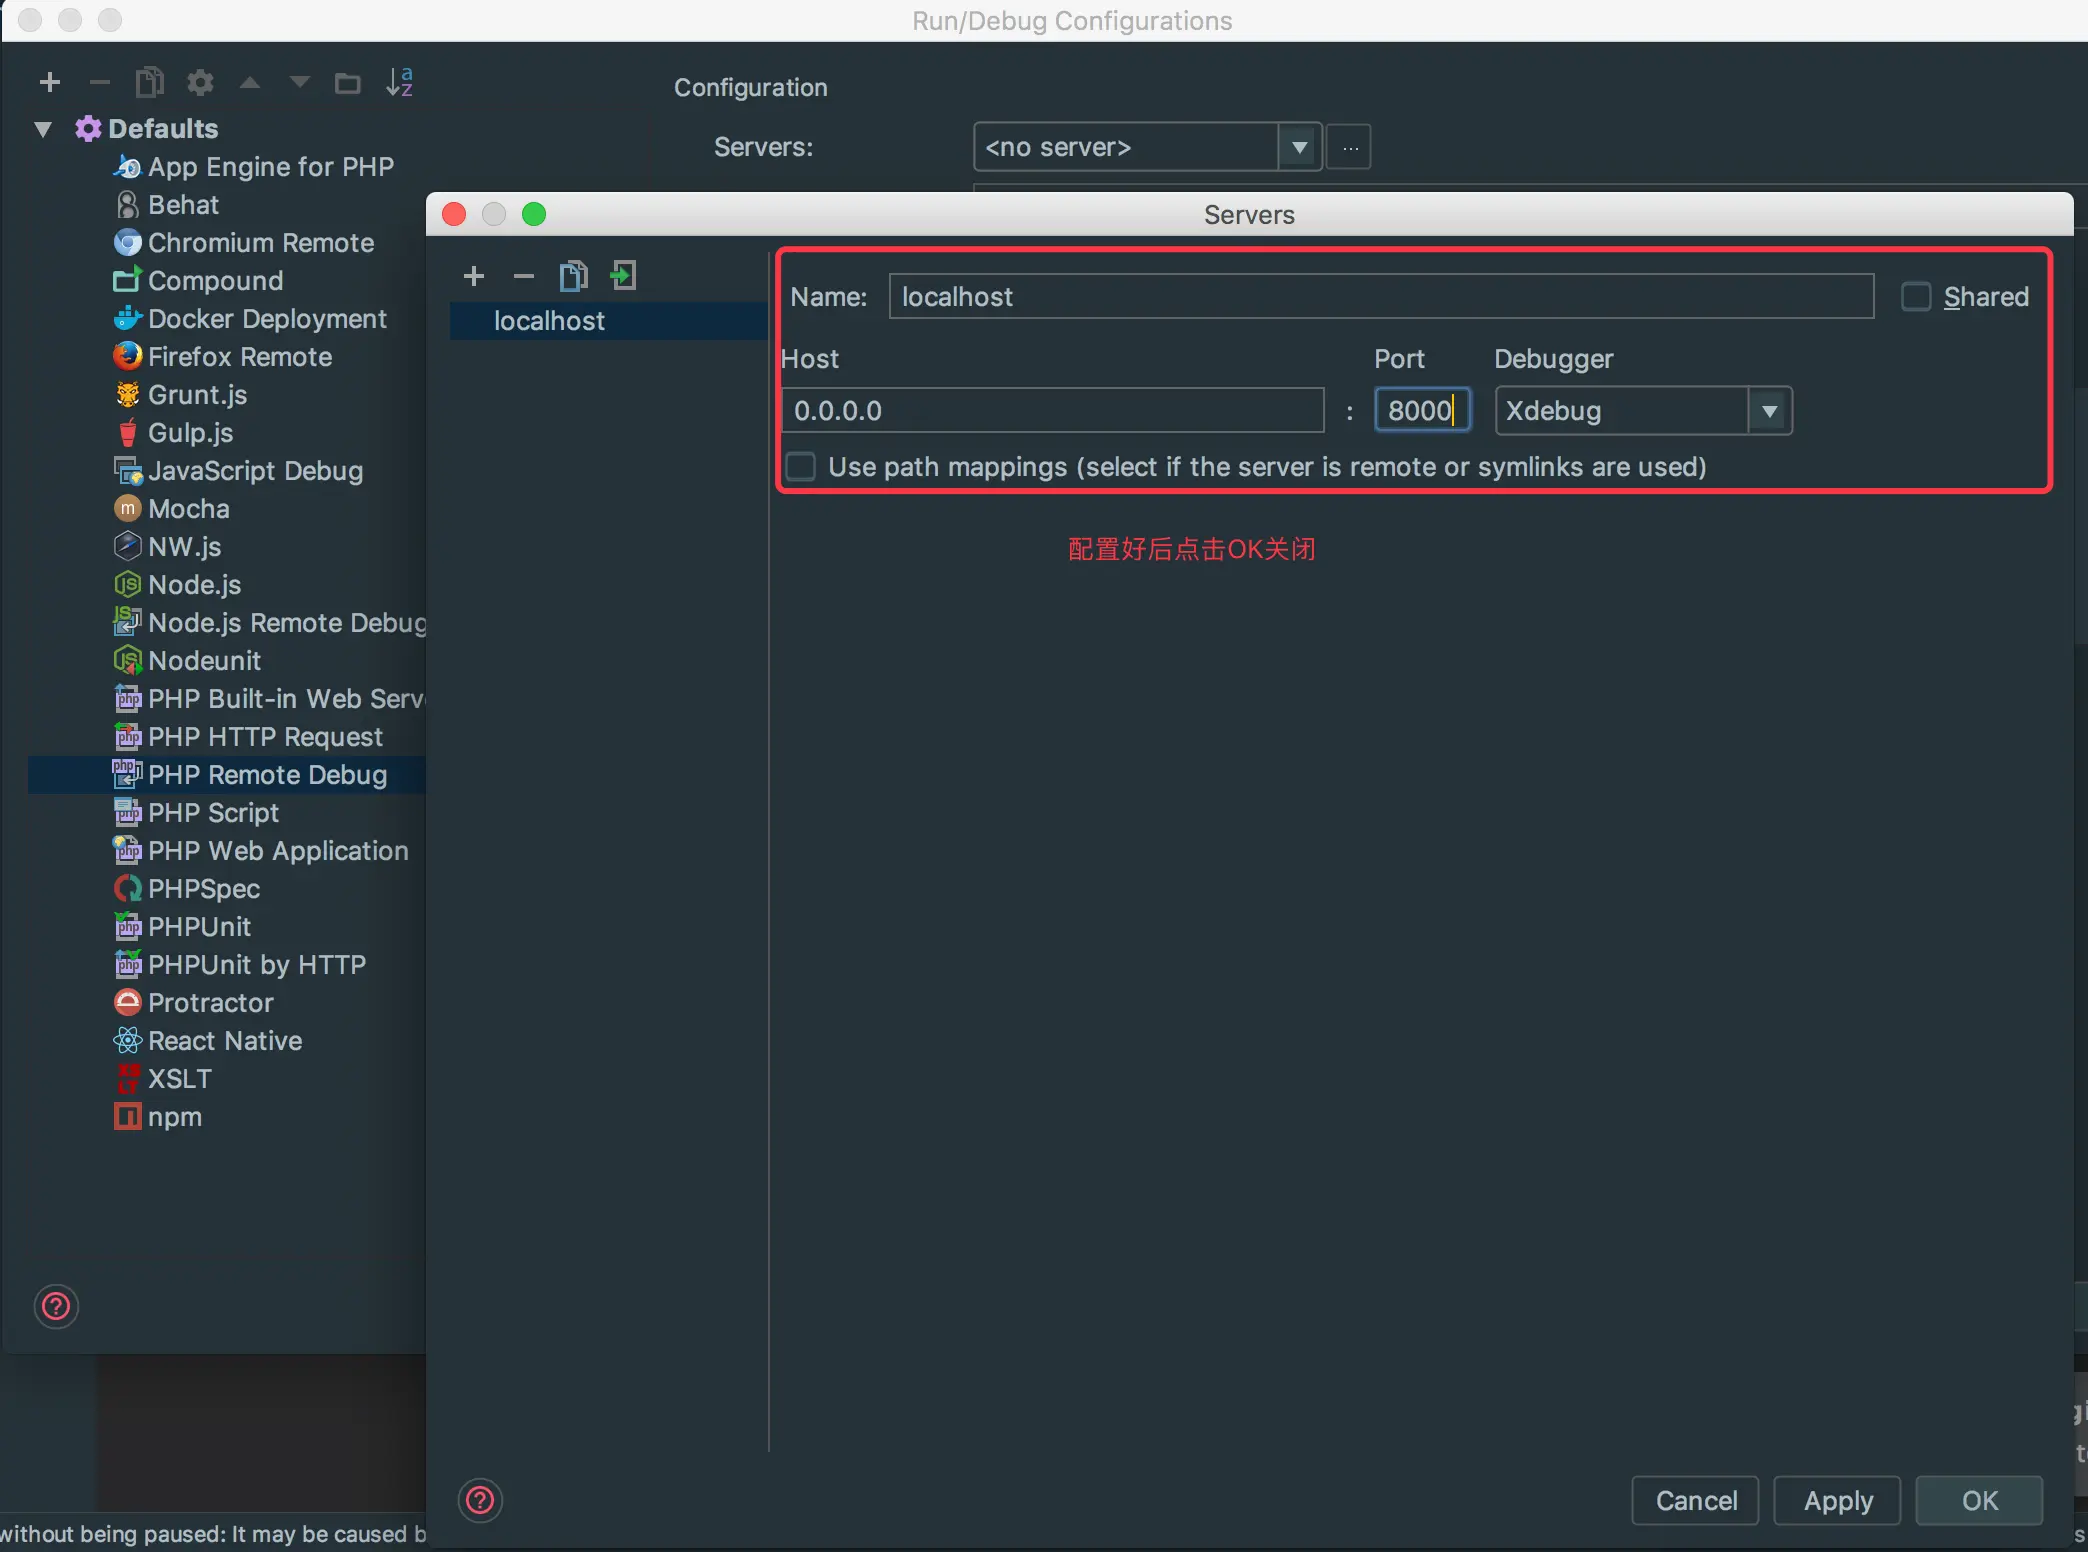
*找到PHP Remote Debug,点击server旁边的点点点,进行配置:
配置PHP Remote Debug
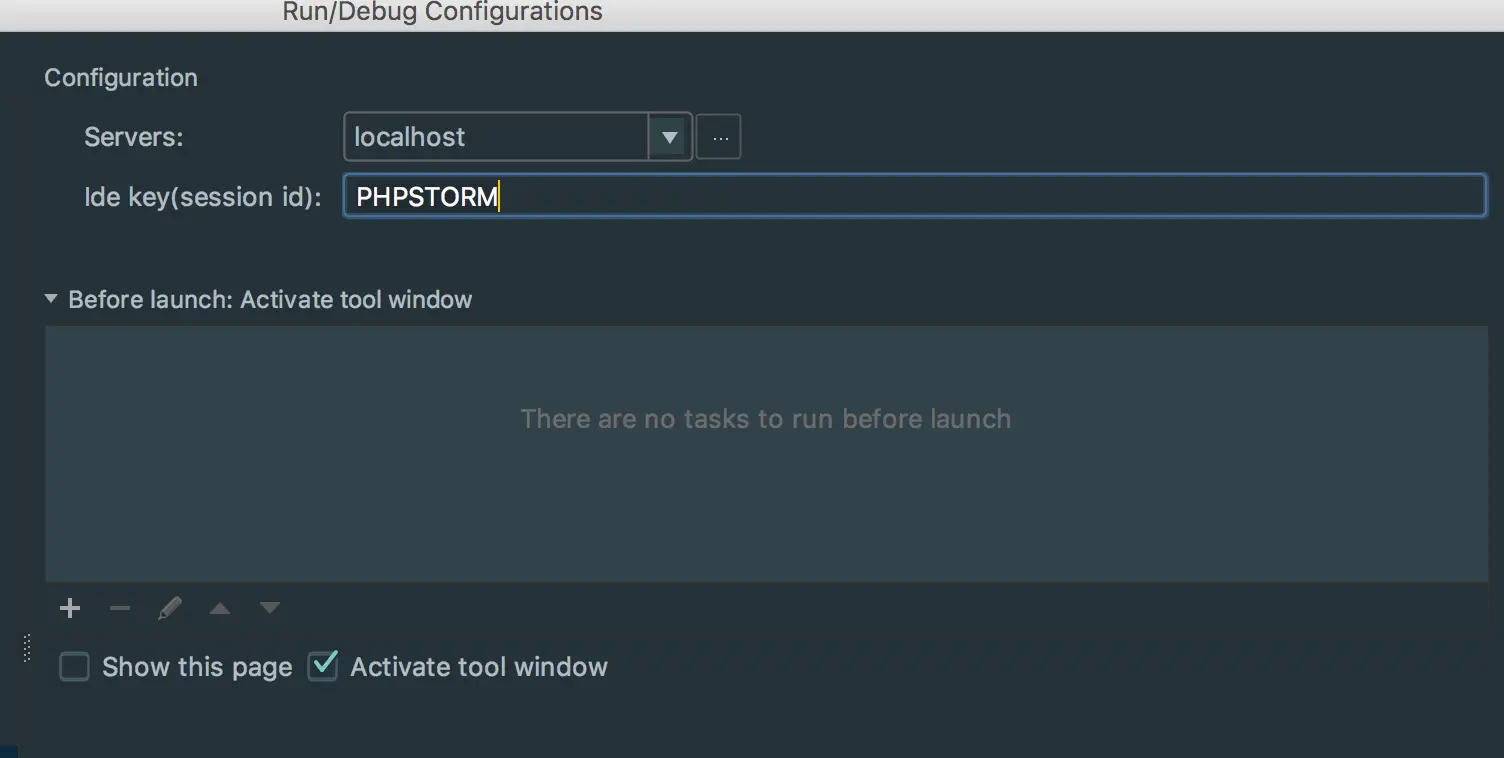
- 在Ide Key上填入:PHPSTORM
填入Ide Key
- 启动debug监听:
启动debug监听
配置Chrome插件
- 安装Chrome上对应的XDebug插件:
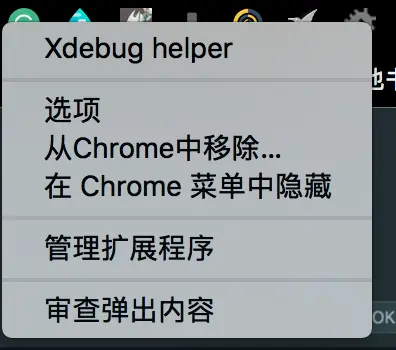
https://chrome.google.com/webstore/detail/xdebug-helper/eadndfjplgieldjbigjakmdgkmoaaaoc - 安装完毕后邮件Chrome上的XDebug插件,点击选项:
点击选项
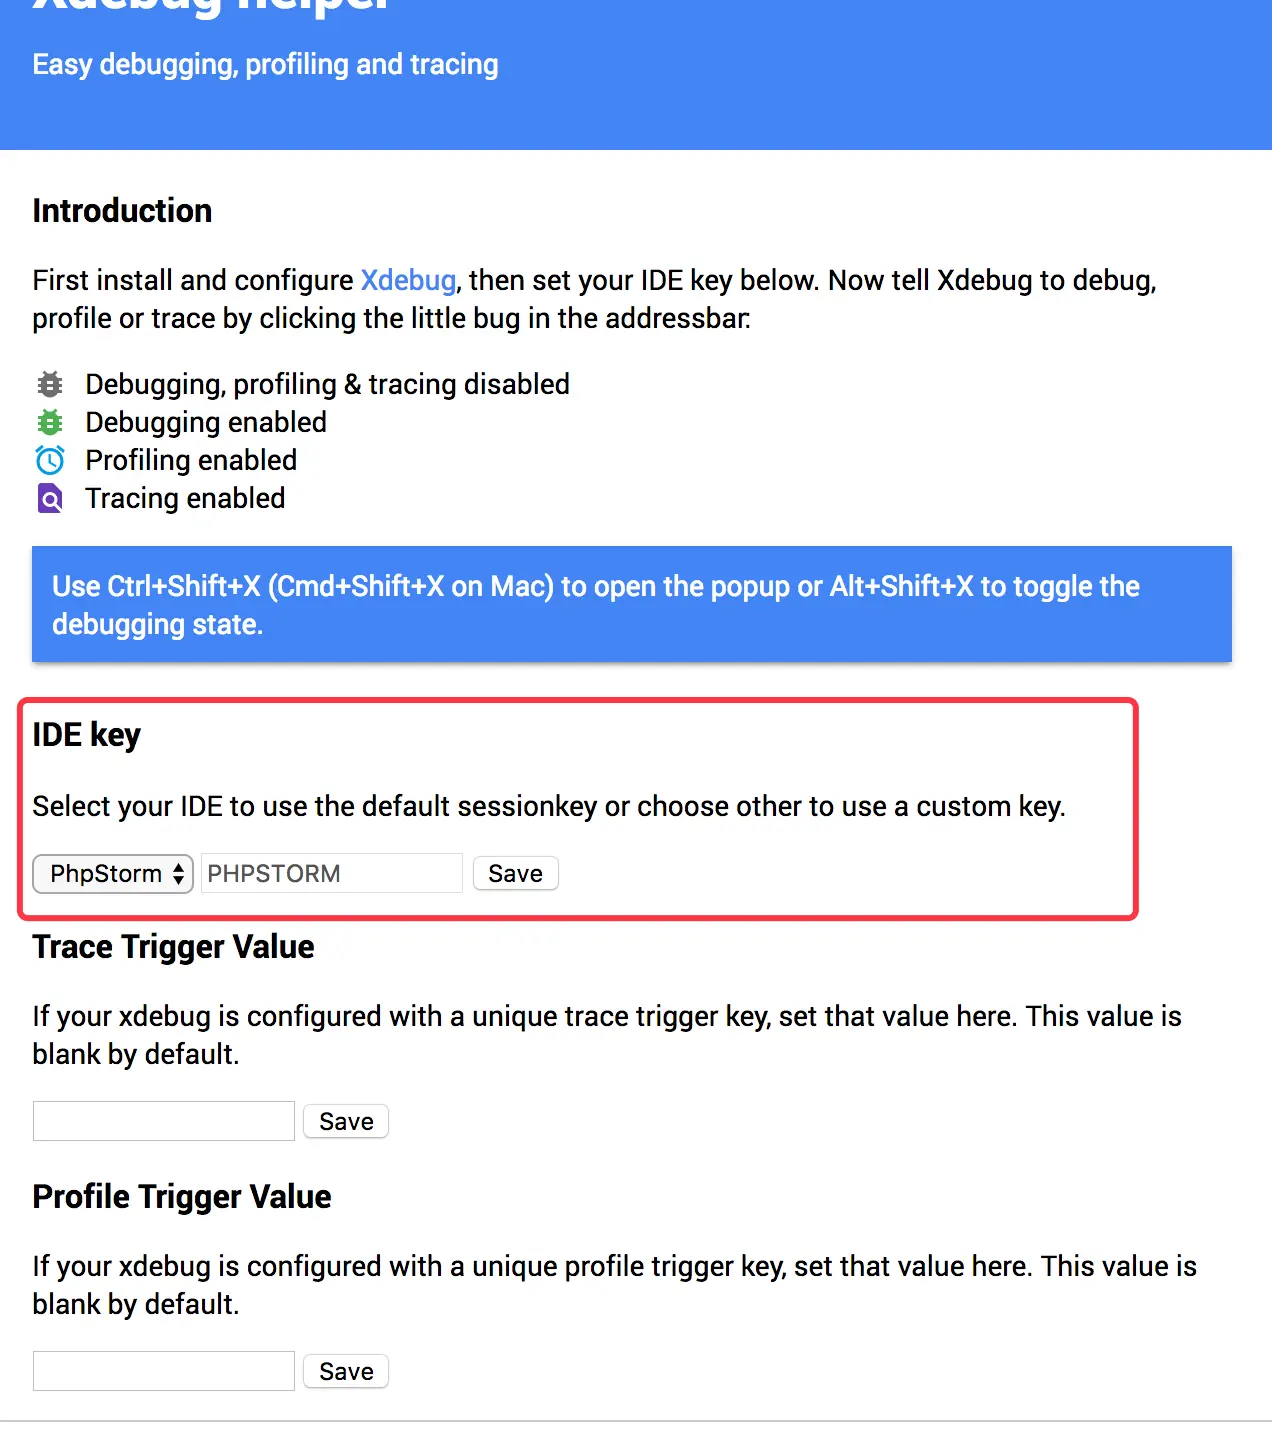
- 在IDE KEY中选择PhpStorm,并填入PHPSTORM(同IDE KEY),并点击save
配置XDebug
Debug程序
- 启动对应的Php程序
启动PHP程序
- 打开页面,并启动Chrome上的XDebug:
启动Debug
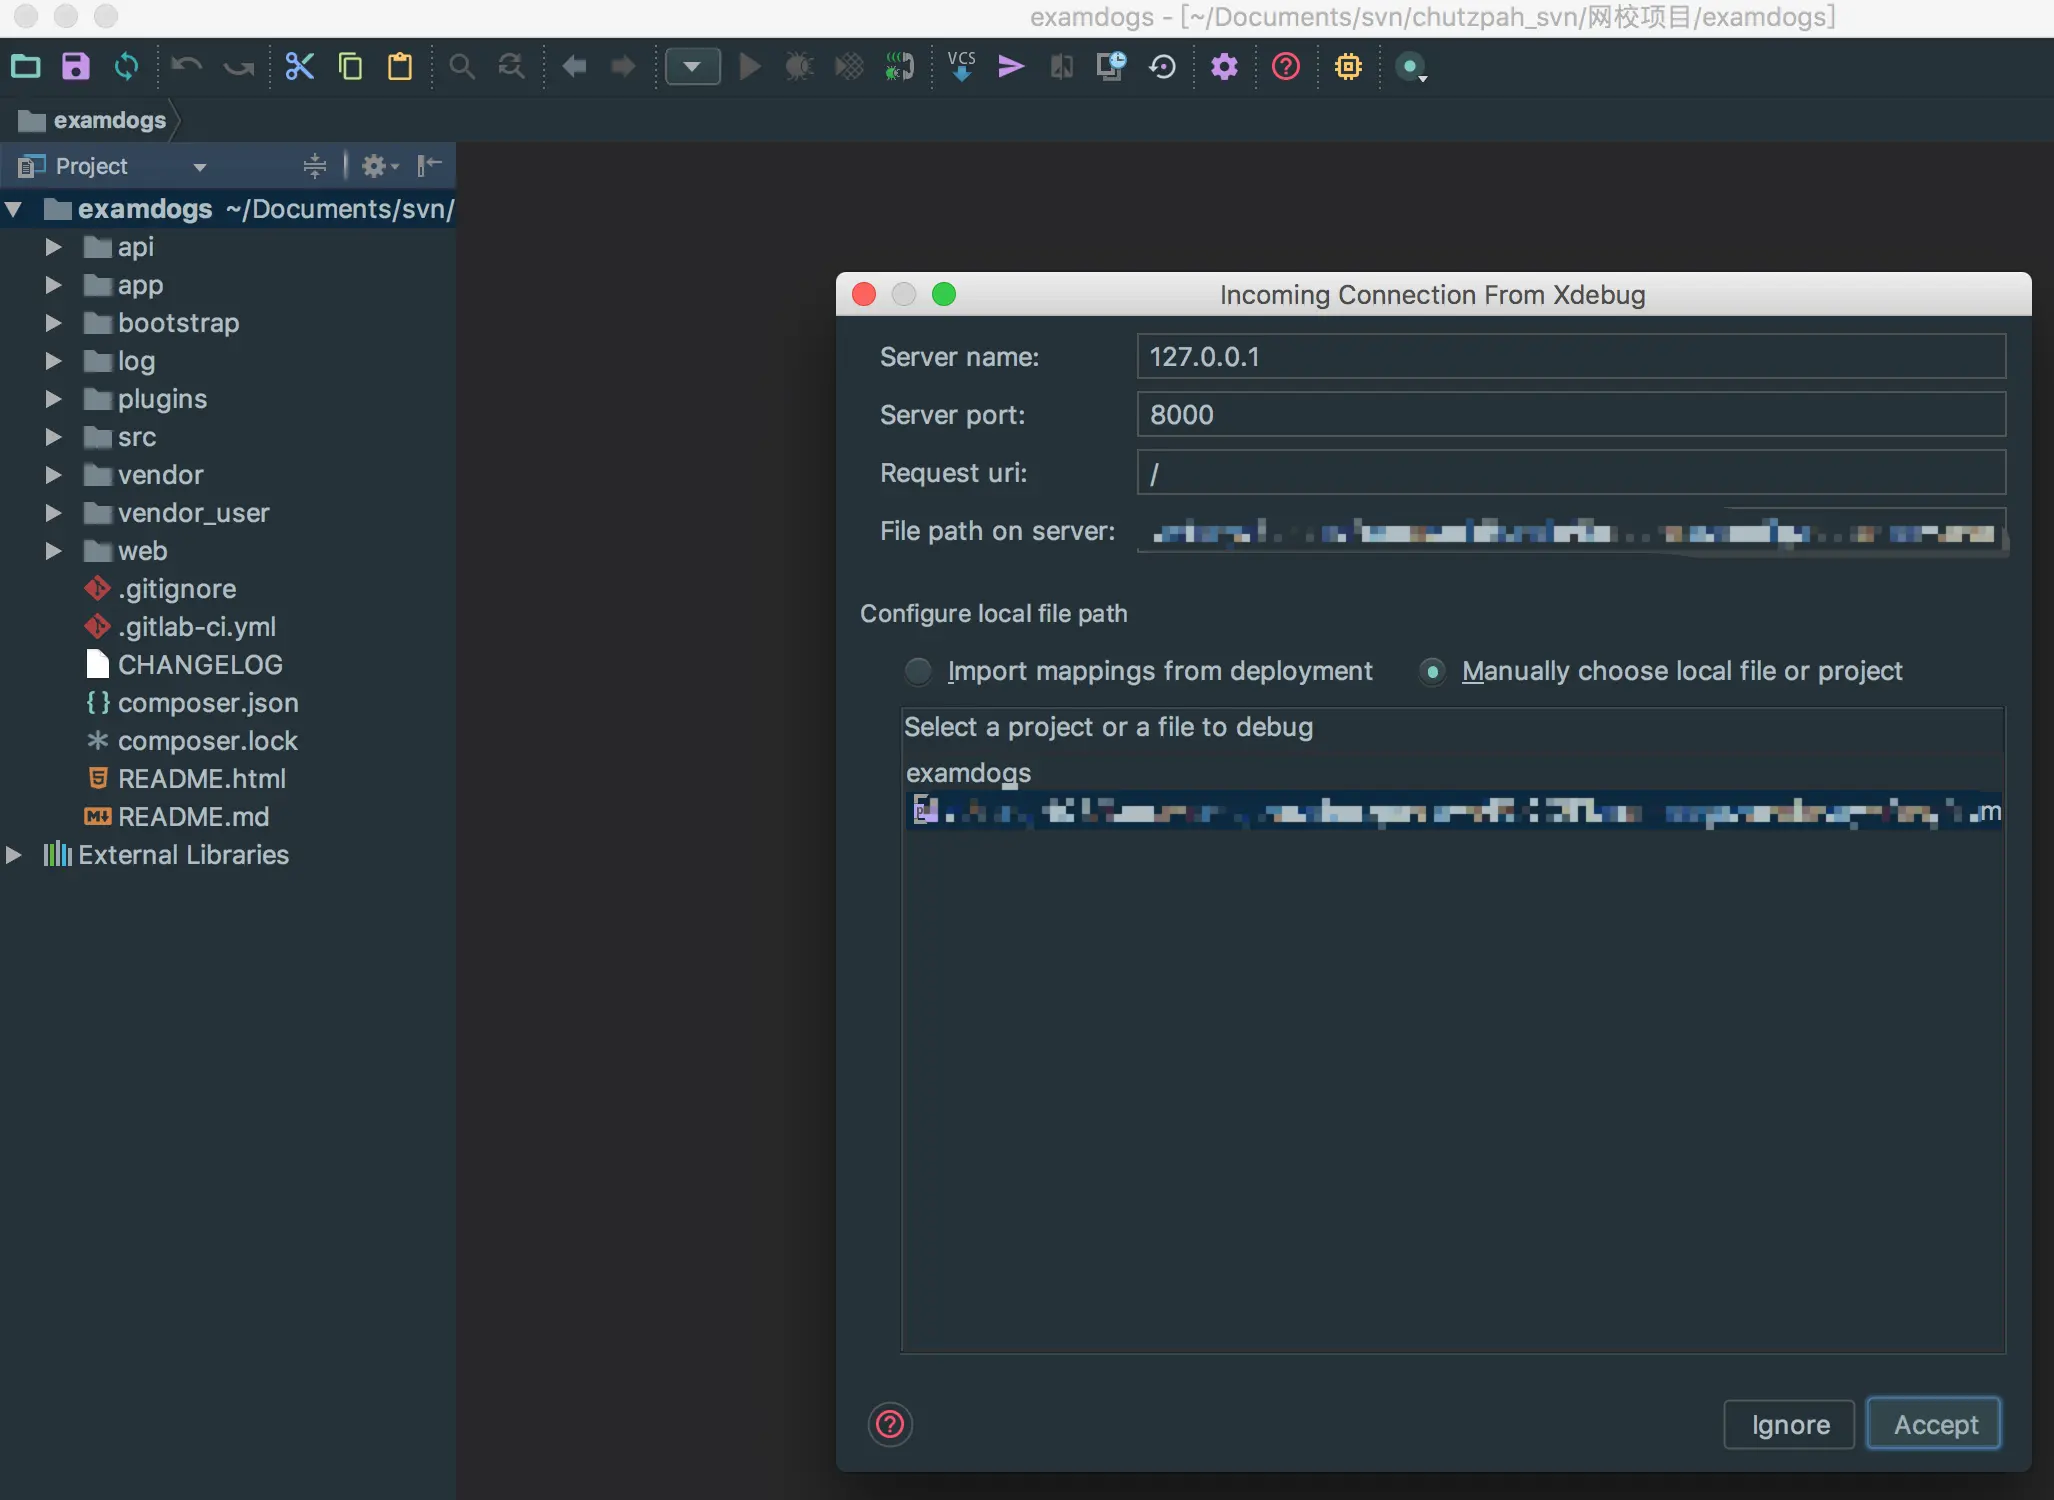
- 刷新页面,PHP STORM会弹出如下窗口:
收到监听
- 点击Accept后就可以开始快乐的给PHP程序打断点了:
打断点DEMO
作者:西风老耄
链接:https://www.jianshu.com/p/3fe69df5d6de
来源:简书
著作权归作者所有。商业转载请联系作者获得授权,非商业转载请注明出处。
